
Flounder fishing is one of the most popular and fun forms of inshore fishing the sport offers. The uniqueness of the approach to flounder fishing is what makes it such an enjoyable type of fishing, as well as the excellent table fare that flounder provides.
I don’t know much about West Coast flounder fishing, but I know quite a bit about the East Coast, especially North Carolina, where I’m from. In fact, in North Carolina, flounder fishing was so popular that our season has been largely closed for the past few years due to apparent overharvesting for many years prior. I remember back even five years ago when our daily legal limit of flounder per person was five. Now, the season is closed all year round except for maybe one weekend, when it becomes one flounder a day per person.
This has sparked tons of debate and hatred in the fishing community, and no one seems happy with the adjusted regulations. While this is an important topic I will touch on again later, you’re not here to listen to me anymore about government regulations. You came here to know how to better catch flounder and become a better angler.
Before I jump into the article, it is super important that we take into account the behavior of flounder and how they operate as a species. This will allow us to target the species better and catch them.
In addition to understanding flounder, another helpful resource that I would recommend is the Fishbox App. Fishbox goes ahead and analyzes a bunch of different factors that play into the bite, such as tide, weather, wind, etc. This gives you a better chance of finding the fish you’re after. So don’t wait; download the Fishing App today.
Get Hot Spots Where
Fish Are Active Now!
Select the type of water you usually fish in:
Without further delay, let’s jump right into the article.
Understanding Flounder: Behavior and Habitat
Before we talk about how we catch flounder, it is important to analyze the species and its behaviors so we can formulate a better approach to targeting them. First, let’s start with the habitat. Flounders love the bottom—that is where they spend the vast majority of their lives. More specifically, flounders love sandy bottoms as they allow them to bury themselves both to ambush prey and hide from predators.
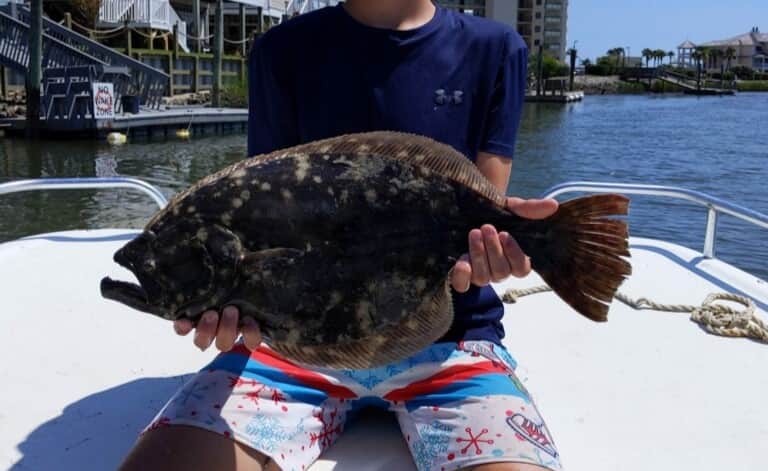
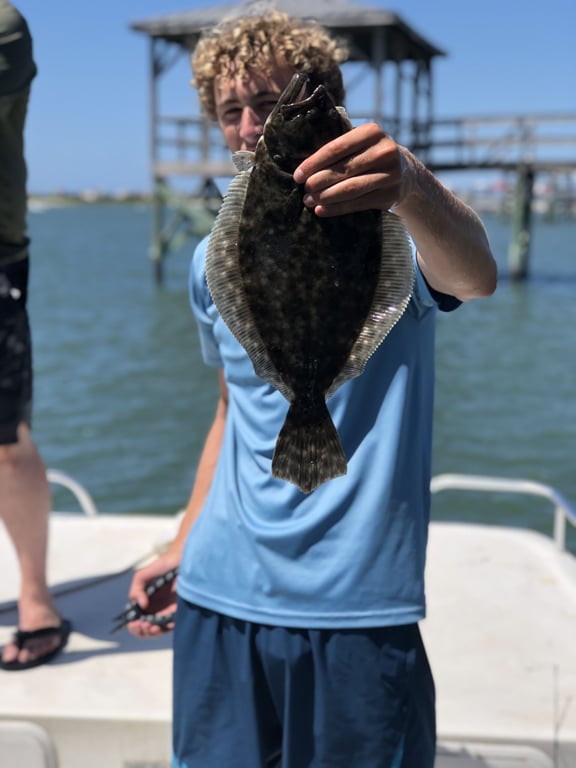
Flounders are distinct flat fish, brown on one side and white on the other. Additionally, both of their eyes face up. Flounder sits on the bottom of the sand, white side down, brown side up. This allows them to bury and camouflage. If you’ve ever walked around in sandy flats at the beach, I can almost guarantee you walked right by a flounder, and you probably didn’t even see it. As a result of their camouflage and body shape, flounders are ambush predators and will often lie in wait in the sand waiting for a minnow or shrimp to pass by.
Read also: Fighting a Fish Even When You’re Outmatched
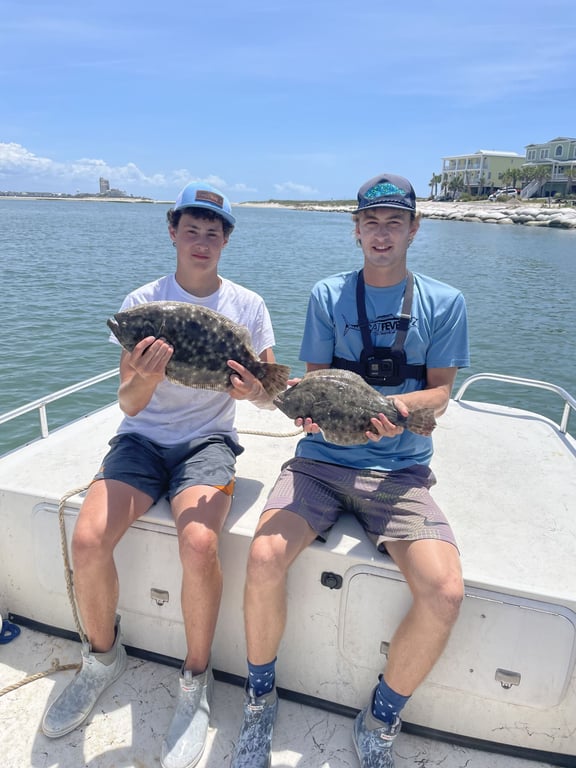
Now, let’s shift toward talking about seasonal patterns. Flounders, at least from what I’ve seen in North Carolina, stay around pretty much all year. However, it may be slightly more challenging to catch them in the winter. In the Spring, Summer, and Fall, they can be found both in shallow water on sandy bottoms near creek mouths or even on nearshore reefs and wrecks in deeper, cooler water. For the most part, Summer will be your best bet for flounder fishing. Especially in North Carolina, where the season is almost always closed, it’s very easy to have a double-digit flounder day.
For best results while flounder fishing, target them in the morning and any tide but slack tide so that you know the water is moving. You want to look for areas like mouths of creeks where bait could be coming in and out. Flounder will often sit in or around the opening of these creeks, waiting for bait to come by. Another great spot to find flounder is in deep holes. You can find these holes using a depth finder. I remember one day, my brother and I found this deep trench, and we must’ve caught 15 flounders in an hour just by sitting around and fishing in that deep trench.
Now that you have a much better understanding of how to flounder fish, I’m going to talk about some recommended gear to use.
Essential Gear for Flounder Fishing
I know I talked about flounder in habitats like nearshore reefs and wrecks. Still, for the gear section, I will only talk about gear regarding inshore and backwater flounder fishing since that is what most people do. I’ve said this before, but fishing gear is mostly preferred. Now, sure, there are definitely some things that are musts to have, but other than that, it’s mostly personal preference.
For your rod, I would recommend something light to medium light because you have to feel the flounder bite, so you need sensitivity. However, you would need a slightly heavier setup if you were fishing a nearshore reef or wreck. I would also recommend a rod under seven feet so you can work more easily on a boat.

For your reel, I would suggest something size 4000 or under. Flounder doesn’t generally run too far, so you don’t need a ton of line capacity. Lastly, for line, I would recommend some kind of 20-pound braid. That will give you plenty of strength, but it still won’t be as easily seen in the water.
Flounder gear shouldn’t ever really vary for conditions aside from your weight. I generally use an ¾ ounce egg sinker in the backwater, but if I’m flounder fishing in an inlet or somewhere where the current is much stronger, I may use up to a 2-ounce egg sinker. You just have to play it by ear, though, and if your weight starts to slide around more than you want it to, then size up.
Read also: Your Comprehensive Guide to South Carolina Fishing Seasons
The only other thing I want to mention in this section is hooks. I use either J hooks or circle hooks. Again, this is preference. I’ve used both and don’t really have a preference. If I’m using a mullet, I’ll normally use a circle hook, but I’ll use a J hook if I’m using shrimp or squid.
Given that we’ve talked about hooks now, we’ve covered the essentials of flounder fishing gear, so let’s move on to the rigs.
Best Flounder Rigs
Again, just like everything else in fishing, a lot of the sport does come down to personal preference—including rigs. With all the fishing I’ve done over the years, whether it be with my family, by myself, or with captains and guides, everyone uses one rig and one rig only to target flounder—the Carolina Rig. Yes, there are others, but for the sake of this article, I’m mostly only going to discuss the Carolina Rig. Some people will also use popping cork rigs or drop-shot rigs for floundering, but from all of my experience, they’re not as effective.
Carolina rigs are always going to be used on the bottom—either just sitting there or drifting along and bouncing on the bottom. To make a Carolina Rig, first slide an ¾ ounce egg sinker onto your main line (OPTIONAL: you can also slide a little bead on the main line after the weight). Next, tie a two-way swivel to the main line, which will keep your egg sinker in place. Follow this with 3-5 feet of 15- or 20-pound monofilament or fluorocarbon leader (this can change depending on the depth of the water and your personal preference). Then, tie on a J hook or circle hook to finish the rig. The size of this hook can also vary depending on the size of the flounder you are targeting or the bait you are using.
To use the Carolina Rig, just cast it out near the mouth of a creek or a sandy bottom. Additionally, you can also drift or use your trolling motor to drag the Carolina rigs down a channel. These are the most effective ways to use Carolina Rig for flounder fishing.
Before I move on to the next section, I want to briefly touch on a few other rigs, starting with the drop-shot. First, I would recommend using a double uni knot to tie a 5-foot section of the leader to your main line. From there, tie a drop-shot weight onto the bottom of the leader. This weight will vary and can be different styles depending on where you are fishing. Then, about 12 inches or so above your weight, tie a J hook or circle hook to the leader. Again, this hook type and size can vary depending on your preference and personal experience.
The drop-shot rig is also fished, which is very similar to the Carolina Rig in the sense that it should be cast by creek mouths and openings but can also be dragged. However, if I had to pick between these two rigs, I’d pick the Carolina Rig every time because it is more versatile.
The final rig I want to touch on is the popping cork rig. This rig is super simple. First, go from the main line to a popping cork (use whatever knot you want). Also, one quick little note: I would recommend using a sliding cork with a bobber stopper so you can adjust the depth. If you use a sliding popping cork, you must tie on a leader first. After that, just adjust the popping cork to the depth you want and tie your desired hook onto the bottom of the rig. Additionally, you can use split shot weights if you feel like your bait is not swimming down enough—this is super important when fishing with shrimp.
Those are the most common rigs for flounder fishing, the most popular being the Carolina Rig.
How to Catch Flounder: Techniques and Strategies
Tons of anglers will give various techniques and strategies for catching more flounders, but I’m going to share my personal tips and tricks to help you guys catch more flounders. One of the most important lessons I learned from my grandfather when I was younger was to wait for the bite. When fishing for flounder specifically, you need to be extra patient. A lot of people don’t know this, but flounders love to sit there and mouth or suck on the bait—specifically minnows. This being said, you must wait for the flounder to swallow it. My grandfather always told me to count to ten once I felt a fish bite my minnow. This would almost ensure that the flounder has the bait all the way in his mouth. So be patient and wait for him to swallow the bait all the way.
This also goes hand in hand with a very common mistake while flounder fishing—don’t yank the hook out of the flounder’s mouth. In my many years of flounder fishing, I have seen so many anglers feel one tap on the minnow and try to set the hook. You don’t need to set the hook—especially not when you feel any tap. Like I just said, be patient and simply reel in the slack to set the hook—no need to rip the jaw off the flounder.
Another tip I would recommend is to use the current and wind to set up a drift in an area you know is likely flounder. From my personal experience, drifting with 3 to 4 rods, all with Carolina Rigs and live mullet, has produced tons of flounder. Additionally, even if you aren’t in an area where you know a flounder, drifting with multiple rods and baits is the best way to determine if a flounder is in the area.
Along that same vein of advice, I would also recommend setting out rods with different baits as well. Set out squid, shrimp, mullet, and mud minnows to test and see what the flounder wants or doesn’t want to bite. The final tip I would again emphasize for flounder fishing is having patience. Flounder can take some time to find the bait, so give them a chance.

Additionally, don’t be discouraged if you don’t have any other bites while flounder fishing—especially when using live minnows. Using live minnows is a great way to target flounder, but you will also have far less bycatch, meaning you could get bored on the rod fairly easily—so just be wary of this.
In terms of adjusting your tactics based on weather, I honestly don’t have much to say at all. From my experience, especially with flounder fishing, the weather is going to really change your approach to catching them. Flounders are bottom dwellers, so the weather won’t affect them as much as other species. The bite might be worse after a bad storm when the water is all stirred up, but that still won’t change your tactics or approach in trying to catch them.
Bait and Lures for Flounder
Now, for probably the most important part of flounder fishing as a whole—the bait. Since artificials are less popular, we’ll start with those. If you are fishing for flounder, your best bet is going to be some kind of paddle tail or fluke. It should preferably be a light color like white or electric chicken. For best results, I like to put the soft plastics on a jig head and drag/bounce them across the bottom. One important note: it is super easy to confuse a bite with the bottom when fishing artificials. So, before you reel in to set the hook, just be wary of the fact it could be an oyster or rock. Take it from me because I’ve broken off on a ton of “monster” flounders that were actually just oysters. Artificials can be great, especially if you know there are flounders in the area. If I were testing to see if a spot had flounder, I would definitely be using some form of live bait, but artificial bait is a great way to pass the time while other rods are out or if you are confident flounder are in the area.
Additionally, there are rare days when the flounder doesn’t want live bait, or you can’t get live bait, and you will be forced to use these artificials. This being said, don’t shy away from the opportunity. I’ve probably caught a quarter of all the flounder I’ve ever caught on artificials, so don’t be afraid to give it a whirl.
Now, let’s move on to the natural baits, starting with dead bait. Flounders will eat dead bait, but they prefer live bait over dead bait. Additionally, other species love dead bait. So, if you’re specifically targeting flounder, I would recommend sticking with live bait. Some dead baits that have worked for me have been mullet (cut and whole), squid, and shrimp. The real issue is the other bait-stealing species, like pinfish and croakers, that will plague you while trying to catch flounder. That is the main reason why I personally stay away from dead bait if I can. I would even say I prefer artificial baits over most natural dead baits, except for a long strip of squid.
Now, for the live baits. There are four baits that I want to specifically focus on here: mullet, mud minnows, shrimp, and pogies. Out of all of these baits, I prefer either the live mullet or mud minnow. Let me break down each of these baits for you.
First, let’s start with shrimp. Shrimp are excellent live bait fished on both a popping cork and a Carolina rig. The downside to this bait is how quickly other fish will get to it before the flounder can. A better live bait option, from my experience, would be the pogy. Pogies come in all sizes, and I prefer a 3-to-4-inch pogy for best results. Pogies are great baits for flounder other than the fact that they simply aren’t resilient, and they die very easily. Flounders will eat them, although they prefer the next two baits, which I will discuss.

An even better live bait is the mud minnow. These minnows have virtually no protection from scales like others, such as mullets. Flounders love to slurp these up because they do so naturally. Mud minnows stick near the bottom and often bury in the mud right where the flounders are. The only downside to the mud minnow is the fact that they don’t get very large, which can be a hindrance when targeting big flounder.
The last and best bait for flounder fishing, from all of my experience, is the mullet. Again, much like pogies, mullet can come in all sizes. Usually, you’ll find mullets between 3-5 inches, but occasionally, you can find some giants even 18 inches long. The reason why I say that mullet is the best bait is not only because flounder eat them naturally but because of their size range. I love using a giant mullet to target a big flounder (I’m talking about a flounder 20 inches or larger). I’ll use a 6, 7, 8 inches long mullet. Only the biggest and worst of the flounder can eat these guys, and these big mullets have and will continue to bring out the true doormats.
Read also: How and Where to Catch Live Bait in Saltwater
All this being said, if you were to ask me personally if I could have any bait to fish for flounder with, I’m picking a 6-inch live mullet every time. A large, hardy bait that flounders love to smoke. One more important note for these baits. I would use a circle hook for any live minnow, whether a pogy, mud minnow, or mullet. However, I’m using a J hook for anything with shrimp, whether dead or alive.
To summarize this bait section: Use live bait when you can and dead bait and artificials if you want to. Almost every flounder angler will tell you that live bait is the way to go, and I would echo the exact same sentiment.
Conclusion
I hope you guys have enjoyed reading this banger of an article about how you can catch more flounder on your next fishing adventure. Take this information to heart and really try to put some of these strategies into practice. Keep in mind that the tips, tricks, and advice found in this article are not just my own; rather, they are a collection of many shared opinions of guys in the flounder fishing community.
Stay safe on the water and pay attention to the rules and regulations while you are out. As always, good luck and tight lines.